Are you looking to grow your email list without using any resources? Content locking is one of the best ways to help you to build email lists, sales increase and boost lead generate.

This is a great way to receive emails from their visitors by providing valuable content for blogger or publisher. However, there are some people who give their content for free. While your content is highly quality, readers definitely provide their email instead it.
Today in this article, we will show you how to grow email list with content locking.
What is Content Locking
Content locking is one such technique used by website owners. In which the visitors have to provide the their email before reaching the content.
Keep in mind that use it in such a way that it does not disturb the user. Means, it would not be appropriate to use it for every content. When you use it in the right places in the right way, it is effective in achieving your goals.
Generally, experienced and successful marketers use it when they are offering highly valuable content such as free courses, ebook download or something similar.
For example, you can check the Brian Dean’s website backlinko, here you will be able to see the good use of content locking.
Now that you know the locking process, let’s know how to add content locking in WordPress.
How to Use Content Locking in WordPress
There are several plugins for the same feature in WordPress that can put new customers in a dilemma.
In this case, you should choose the right plugin which proves to be multi-uses.
OptinMonster is first choice of smart marketer to growing email list. Because, OptinMonster highly-converting email capture form combined with advanced targeting and behavior automation helps you boost conversions and grow your email list.
These aren’t the only methods of growing your email lists on OptinMonster. In addition, there are hundreds more attractive methods that help to grow your email list.
You can also be seen another post to grow email list how to use spin to win in WordPress.
Install and Activate OptinMonster Plugin
After getting the right plugin, you need to do is install and activate OptinMonster. For morw details, see our helpful guide on how to install WordPress plugin.
After activation, upon proceed it will ask your API username and key to connect to the OptinMonster account.
To get the API username and key you have to login to your OptinMonster account. Here you will get API related information inside the API menu.
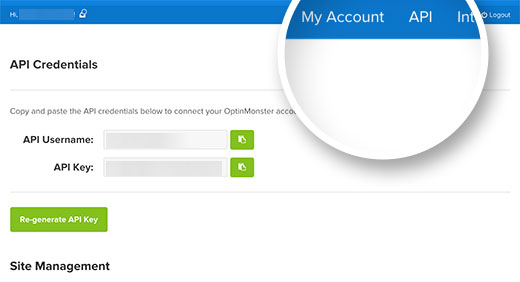
Now you have to copy it, then come back to the WordPress dashboard again and click on OptinMonster. Next, paste the copied API username and key.
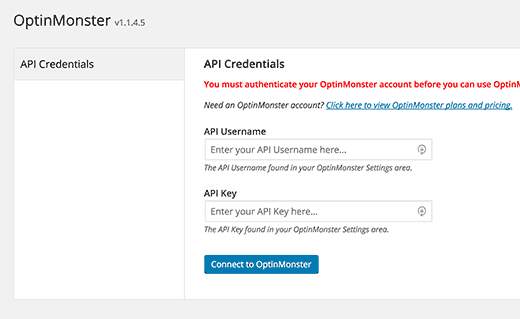
Now, click on the ‘connect to OptinMonster’ button. Once you’ve successfully connected your OptinMonster account with plugin. So, your account is ready to create the optin campaign.
Create Content Locking Campaign
Firstly, click the Create New Optin button in the OptinMonster plugin to get started.
This will redirect you to the OptinMonster website. Next, you will need to provide a title for your optin campaign. You’ve to select the website from dropdown menu for which you are looking for optin campaign.
Now you also need to select ‘After post / inline’ as your optin type. Now you will see the right side pre-made template. You can choose one of these for your campaign.
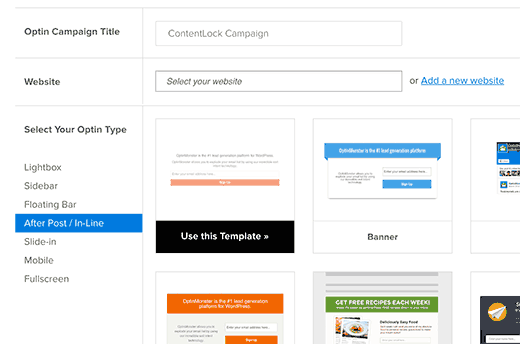
Click on the template to use. This will open OptinMonster’s form builder where you customize the appearance your optin and configure its settings.
Now here you can edit text, change color, font for your campaign.
Go ahead and click on the Optin menu, then scroll down to the go to Content Blocking section. Turn on content blocking for this optin by sliding it to on/off switch.
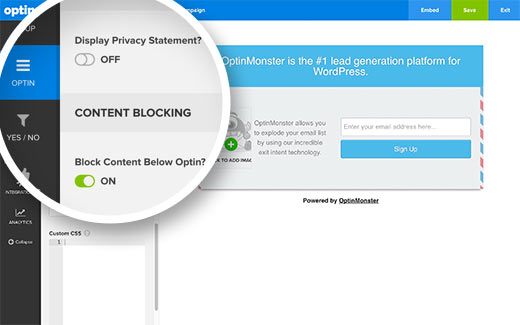
After turning it on, you need to select the content blocking method. You can use Obfuscation which blurs the content, or Removal which totally removes the content below Optin.
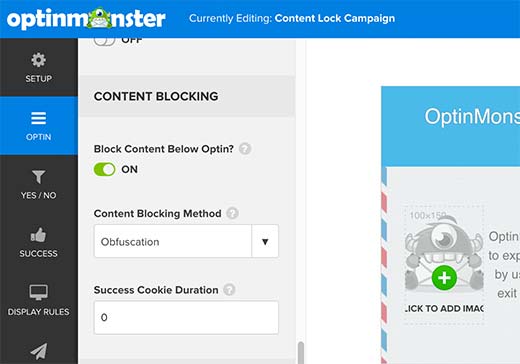
The amount of time it takes for the content to be unlocked is determined by the Success Cookie Duration. You also need change success cookie duration to 0.
You’re done, don’t forget to click the Save button at the top right corner of the builder to save all the settings.
Add Locking Campaign in WordPress Post/Page
Firstly, you go to the OptinMonster WordPress plugin from the admin dashboard. Here you will see all the campaigns created. If you don’t see the locking campaign, then click on the Refresh Optins button.
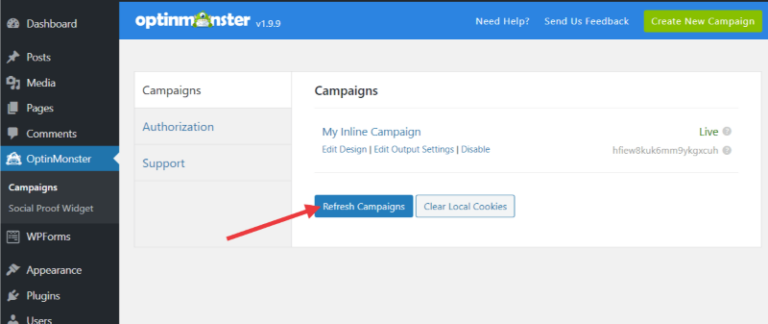
Then you move the mouse to the optin title you want to enable and click on ‘Edit Optin Output Settings’.
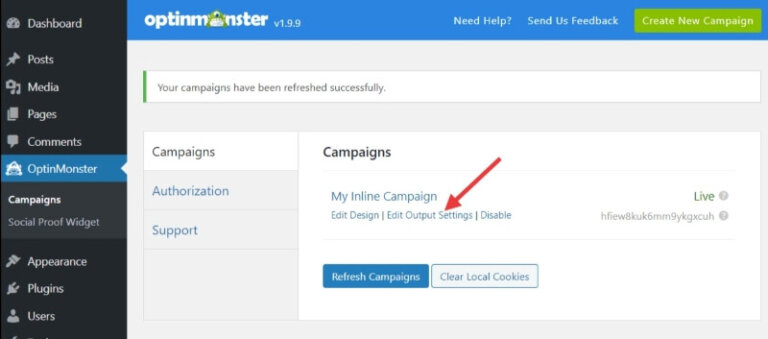
This allows you to display the short code for the campaign. And copy the shortcode for tha campaign.
Finally, you paste shortcode into post on your website where you want to see the campaign.
Now you publish your post, your Inline campaign will now appear on the website.
Final Thoughts
You should put it after the first paragraph. Because you can use the first paragraph as a teaser to tell the users why you need to read the remaining parts of the page.
I would recommend you to make your more quality content so that the user will be remain interested in reading the article.
I hope this article helps you in build email list using content locking. you can also see another way to build email list using spin to win.


