Google Analytics 4 is a powerful tool that provides informative data about your website’s performance, user behavior, and marketing effectiveness.

In this article, we will discuss the key features and benefits of GA4 (Google Analytics 4) and how it can help you take informed decisions to improve your online presence. Furthermore, we will provide you information about the configuration of Google Analytics 4 for your website step-by-step.
Key Features of Google Analytics 4
As the world of online data continues to evolve, business can’t longer rely on the outdated methods of the past. In such a situation, GA4 is an important and advanced latest technology that provides more comprehensive and flexible views to track and understand your digital performance.
The main focus of Google Analytics 4 is to analyze more event-driven data that gives deeper insights into user behavior and engagement. Now gone are the days of just tracking page views and sessions – GA4 gives you the ability to track a wide range of custom events and interactions, providing a reacher understanding of how your audience interacts with your digital properties.
But the benefits of GA4 extend far beyond just data collection. The platform’s advanced machine learning capabilities enable predictive analysis so that users can predict future trends and make more informed decisions.

Ultimately, the transition to GA4 is not just a technical upgrade – it’s a strategic imperative for any business to stay ahead in the digital landscape. By embracing this new era of analytics, you will be better equipped to navigate the ever-changing demand of your customer and drive sustainable growth of your business.
Google Analytics 4 (GA4) Vs Universal Analytics (UA)
Google Analytics 4 is the latest iteration of Universal Analytics, which is known as an advanced and sophisticated analytics tool. GA4 offers a wide range of features and capabilities that make it an attractive option for businesses wanting to get deep information in their digital performance.
One of the key advantages of GA4 is its ability to track user behavior across multiple platforms and devices, including web, mobile and even offline interactions. This cross-device tracking allows for a more comprehensive understanding of the customer journey. As a result, you’ll be able to make informed decisions about the right marketing strategy and optimization for your business.
GA4 focuses more on machine learning or predictive analytics so that users get valuable information and suggestions which as a result helps in growing the business. The platform’s improved data modeling and AI-powered features enable businesses to anticipate customer needs, identify potential issues, and make more strategic decisions.
Compared to UA, GA4 also offers better data privacy and compliance features, which are aligned with evolving regulatory perspectives and consumer expectations around data security. GA4 becomes an attractive option for businesses that prioritize data privacy and security.
Configuring Google Analytics 4 for Your Website
Configuring Google Analytics 4 for your website is an essential step to effectively track and analyze your website’s performance. By setting up Google Analytics 4, you are provided with valuable information about visitor behavior, page views and other important metrics that help in optimizing your website for the best results.
We’ll walk you through the process of configuring GA4 for your website so you can get the most out of this powerful tool.
GA4 Website Setup
GA4 needs to be installed on your website to understand your audience and optimize your online presence. In this article, we will discuss how to install G4 on your website using two different methods:
- Configure GA4 with Setup Assistant
- Install GA4 with Google Tag manager
Method 1. Configure GA4 with Setup Assistant
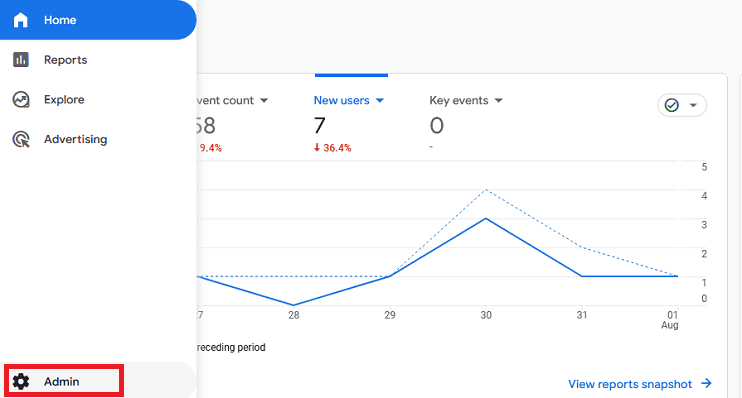
Go to google analytics account and navigate “Admin” (gear icon) from the left menu pane.
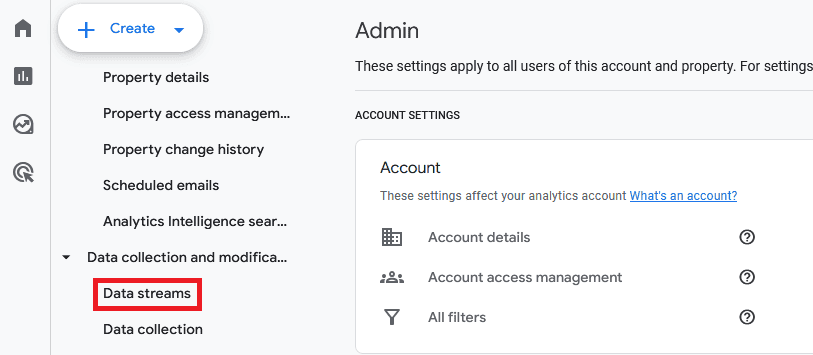
Now look for the “Data Steam” section in the Property Settings and click on the one you want to use.
Look for “View tag instructions” under Stream Settings and click the button of the same name. This is where you’ll find the GA4 tracking code snippet.
Copy the entire snippet code displayed on the screen.
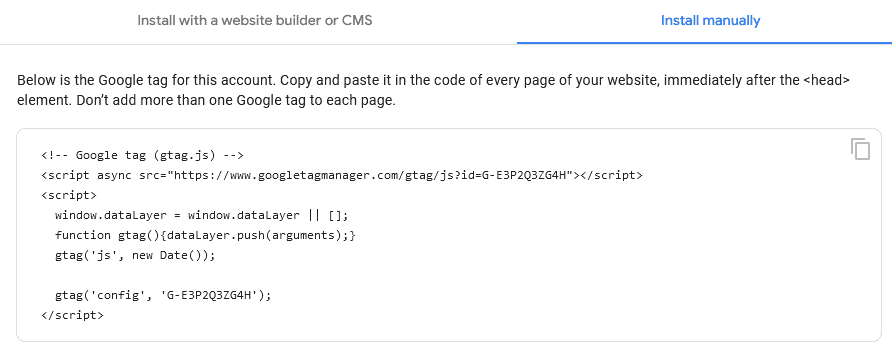
Paste the copied code snippet immediately after the opening tag. Save the changes made in your website’s HTML file. Re-upload the updated file to your website’s hosting platform.
After implementing the code, it may take some time for G4 to start collecting data.
Method 2. Setup GA4 with Google Tag Manager
Go to the Google Tag Manager homepage, login with your Google account and go to account setup. Enter your business name and select the country where you work.
Go to the Google Tag Manager homepage, login with your Google account and go to account setup. Enter your business name and select the country where you work. You can enter the name of your website. If you want to measure a website then select Web as the target platform.
You will now see the Tag Manager Terms of Service Agreement, tick on the GDPR condition, then click Yes.
You’ll see code snippets to paste into the and tags on your website. Once you have connected the website to GTM, you can configure it to track all events for the website.
Optimizing Google Analytics 4 Tracking for Your Website
By optimizing your Google Analytics 4 tracking, you can gain valuable information about your website traffic, user engagement, and conversion rates. In this section of the article, we will discuss the best ways to configure website tracking events so that you can track relevant data effectively to take informed decisions.
Google Analytics 4 Event Tracking
Google Analytics 4 will measure user interactions on your website as events. This cross-platform tracking is the basis of GA4’s measurement model, unlike Universal Analytics, which relies on session-based data.
Google Analytics 4 automatically collects some event data when you set up a tag on your website.
Enhanced Measurement Events
Enabled advanced mapping is the default setting when creating a data stream. This allows Google Analytics 4 to automatically track user interactions on the platform.
To enable the setting, go to Google Analytics 4 Admin and click on Data Collection and Modification » Data Streams in property Settings.
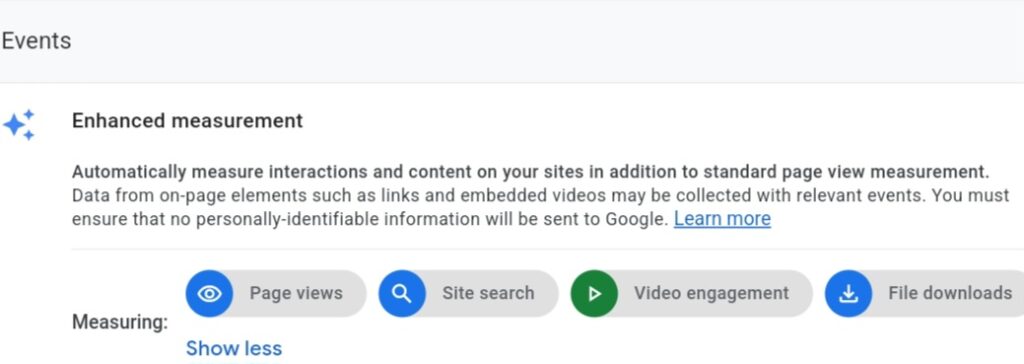
So let’s take a closer look at GA4 default event tracking:
- Pageview– Google Analytics 4 collects these events automatically when a page is loaded or the state of the browser history changes. You can track this event with view metric, page_location, and page_referrer dimensions.
- Scroll– Scroll tracking event fires when a user scrolls 90% of the way down a page.
- File downloads– Collects data on any files downloaded by visitors, including text, executables, audio, video, presentation, and compressed files.
- Video engagement– Video engagement tracks start(video_start), end(video_end), and watch duration(video_progress) for embedded videos.
Costom Event Tracking
You can measure other events unavailable in the recommended events list by creating custom events. In this section, we will learn how to track this using Google Tag Manager.
For example, let’s say you own an online store and you want to track visitors who click the preorder button. So to do this, you follow all the steps given below:
First, open your Google Tag Manager dashboard and click on the Variables menu from the left sidebar.
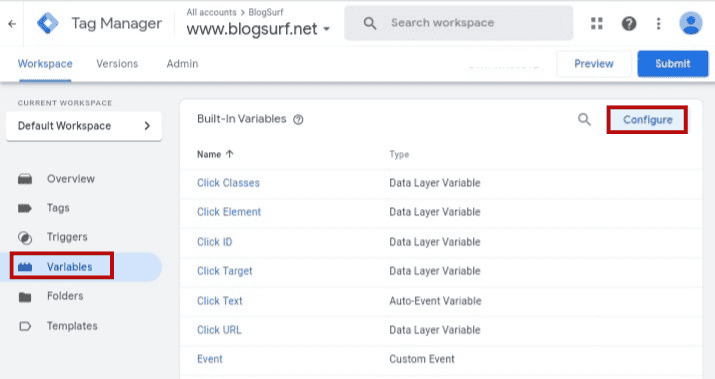
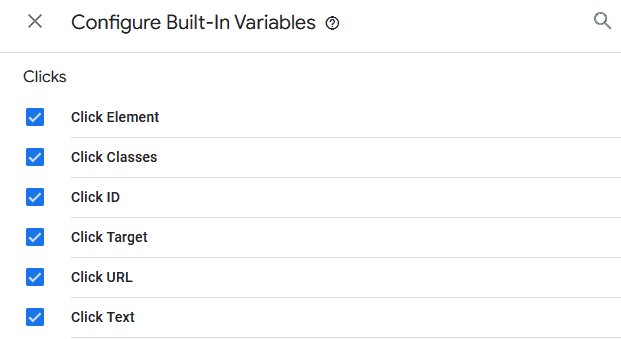
After that click on Configure button on upper right side and enable all variables under Click by ticking them.
Then, go to the Google Tag Manager dashboard and click on Preview. Now you will be redirected to a new window of Tag Assistant. Where your website’s URL is already entered (if not you can enter) you need to click on Connect below. This will take you to your website where you need to click on the Pre-Order button.
Close the tag assistant window and come back to GTM and create your new tag: select GA4, and choose Configuration tag then create your own event name instead of using the previously known event name from GA4.
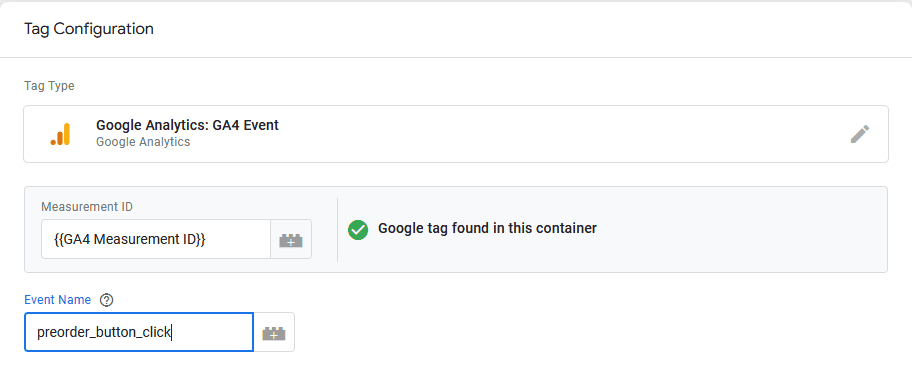
Negative to the Event parameter and click Add parameter.

Add custom parameter name. For example, we will use preorder_button. For value, click on the plus(+) and select Click text variable from the list.

Now to create a new trigger, click on the plus (+) on the page and select All Elements.
Configure the trigger condition, select some clicks. Copy the Click Classes values from the your summary page to the triggering configuration panel.
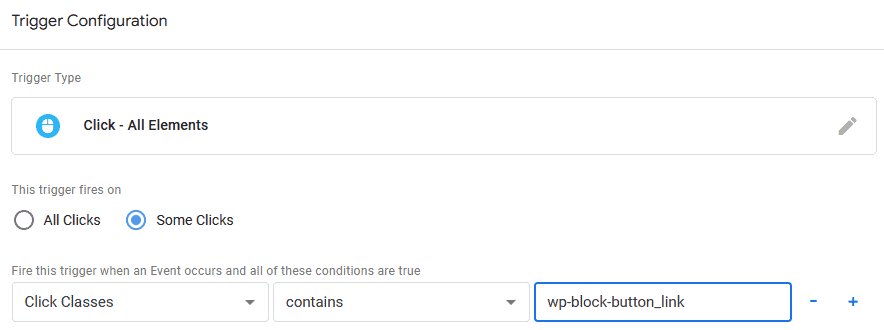
Rename the your triggering and click the Save button.
Finally, create a name for your tag and click Save to finalize the setup.
Lastly, click Preview and use Debug View to make sure the tag is active and collecting data.
To view your event report, click on the GA4 Report » Engagement » Event. This lets you have most detailed view of the events in a certain date range from one dashboard.
Google Analytics 4 Custom Dimension
Custom dimensions are a GA4 feature that allows you to collect and discribe data in a customized way. Essentially, they are parameter you create in GA4 to capture information that is not automatically tracked by tool.
You can create different types of custom dimensions depending on the information you want to collect in a custom way:
- User-scoped custom dimension: Lets you analyze user-related attributes that describe groups of your user base age, language and country.
- Event-scoped custom dimension: This refers to the interactions happening on your website. It could be any event parameter created for recommend event or custom event such as generate_lead or login.
- Item-scoped custom dimension: It is especially used to add item-related information; eCommerce websites are a perfect example of this; it can be added as an add-to-cart parameter.
How to Create Custom Dimension
As we know the importance of custom dimension, it is even easier to create them. In this article, a step by step guide has been given to configure event-scoped custom dimension.
Let’s learn how to create event parameters to analyze the video URL that a user plays on your website:
It is a manually configured event parameter which is only included in Google tag management so including it automatically in GA4 is not sufficient. For this, you will have to go to Admin » Data Display » Custom Definition and inform GA4 about it.
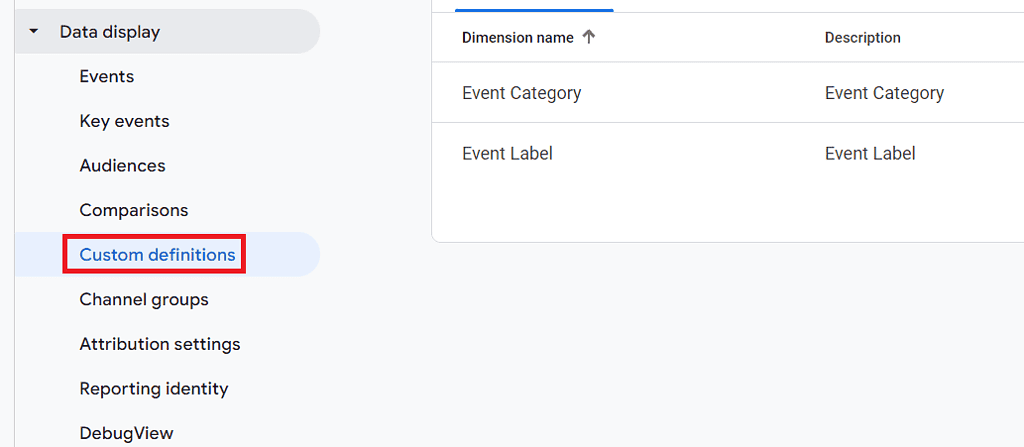
Next, click on the Create custom dimension.

Create a custom definition using information from your event parameters.
Now that your custom dimension is created, use debugview to check if it is collecting data correctly and is configured properly.
On this page, in the custom definition section, by clicking on Quota information parallel to it, you can see the number of all custom dimension created in your GA4 account.
Overview Google Analytics 4 Reporting
Google Analytics collects data from your website and apps to create reports that provide information about your business. You can use it to monitor traffic, examine data, understand users and their activities.
When Analytics starts receiving data, the data appears in the Realtime report and after some time other reports appear. After setting up Google Analytics, some data of your report is automatically collected from your website or app, whereas some reports require some additional setup.
You can get all your reports by clicking on Reports from left menu under Google Analytics.

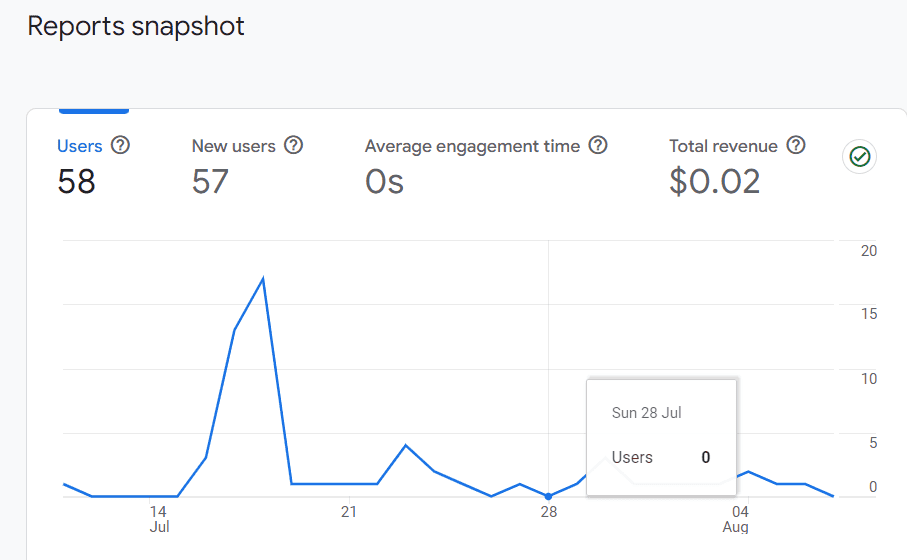
The Snapshot is the overview when is visible when you click on Reports in the left navigation in GA4. Here, you can see important information like users, new users, average engagement time and total revenue.
Realtime Reports
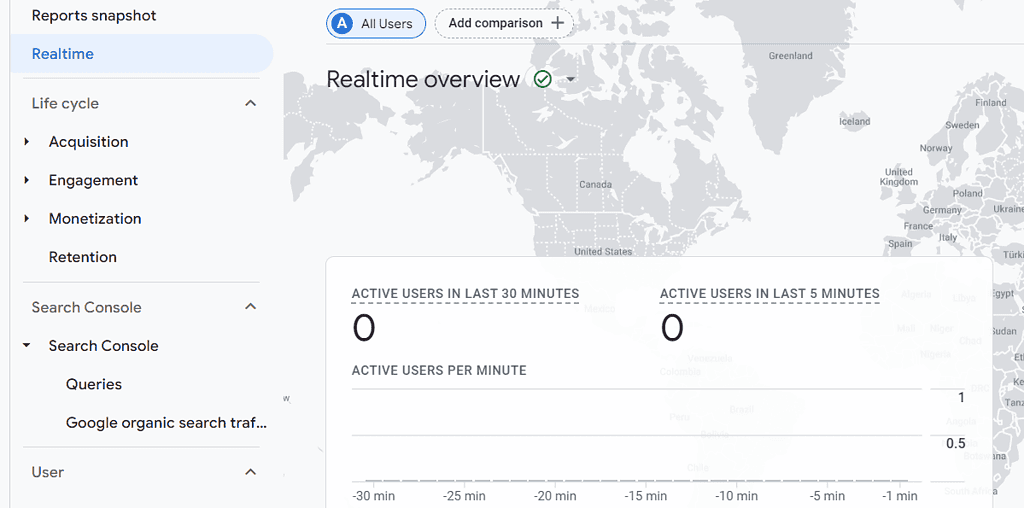
Realtime Report lets you track the activities happening on your websites and apps. The realtime overview report lets you track current active users, pageviews, events, conversions, and more.
Acquisition Reports
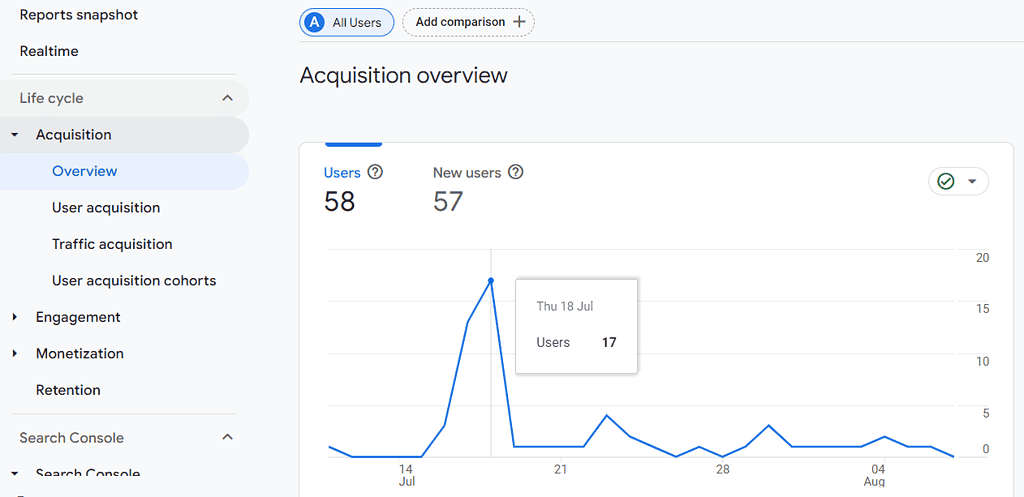
Acquisition overview reports are pre-built overview reports that provide you with a summary of acquisition data. This allows you to identify where your traffic is coming from and check spread between new and returning visitors.
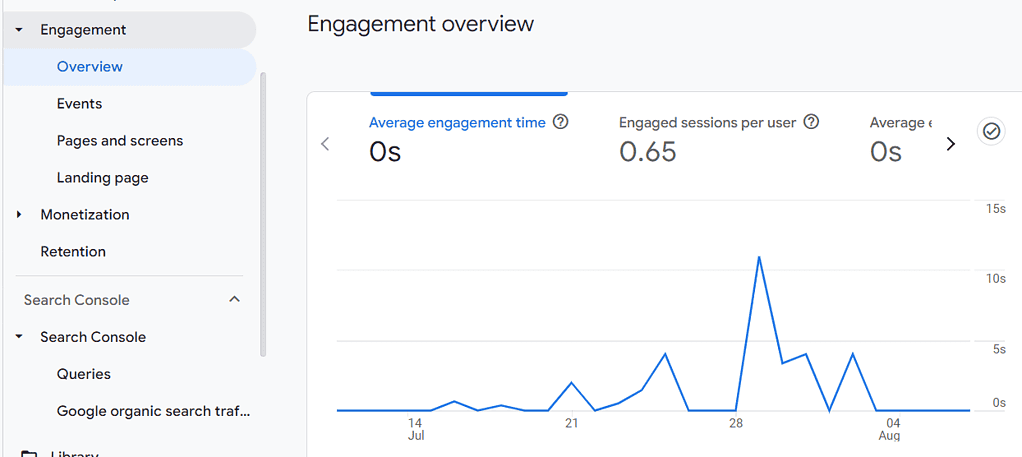
Engagement Reports
Interaction reports enable detailed reports of observations to be displayed on one screen. Includes events, conversions, landing pages opened, and pages/scenes viewed. It report provides you with valuable information about your visitors to help you make data-driven decisions to improve your business.
Monetization Reports
Monetization overview reports are pre-built reports that give you a summary of revenue data. This report shows you the revenue you’re getting from products and ads displayed on your website and mobile app.
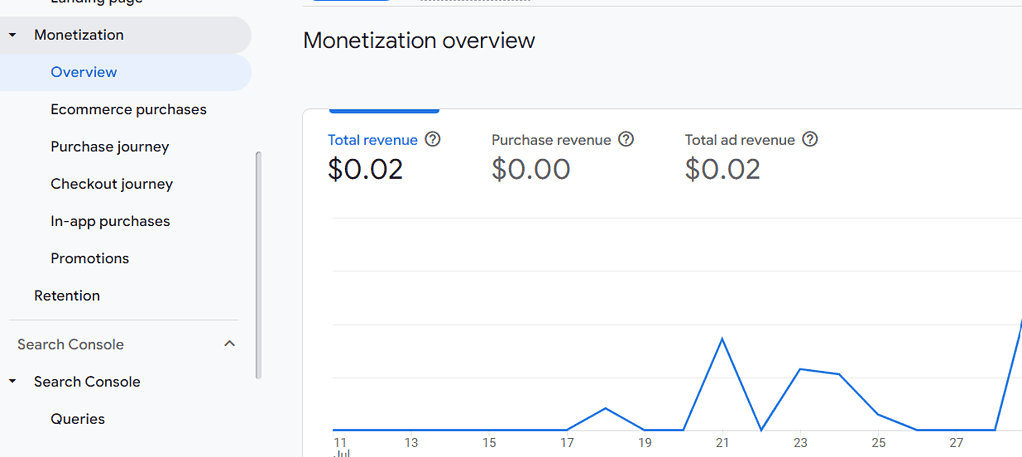
Additional, you can also get many other reports which highlight important metrics like your user behavior, conversion rate and traffic sources.
Google Analytics 4 Dashboard
The Google Analytics GA4 home page shows you relevant information based on visitor behavior. You can use page to monitor your traffic, navigate around analytics, and get insights about your website or mobile app.
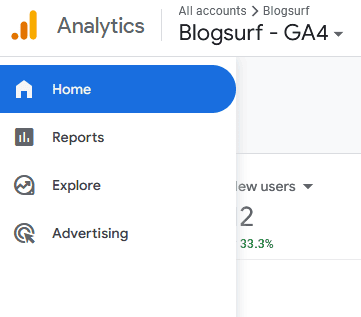
To access the Home Page, click Home from the left navigation.
The metrics relevant to your website appear as trend lines in the overview. Update the metrics in the overview based on your behavior in GA4.
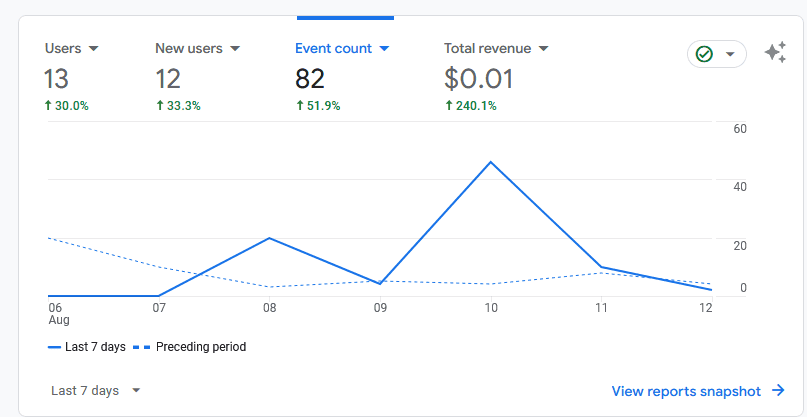
You can also change each of the metrics in the overview card by clicking on the drop-down. Select the drop-down for the metrics you want to view in the report.
Realtime
Realtime Overview report displays country wise user count. It reflects last 30 minutes of data collection. Know up to 5 countries from which user activity originates.
In the realtime overview, you can choose from several dimensions (e.g. audience, city) or metrics (e.g. users, new users) using the drop-down. Or you can choose the Choose for me as dimension and metric.
Recently Accessed
This section includes a link to your Analytics account that you’ve recently viewed. For example, if you recently visited the admin page, that link will be included in this section. It will also tell you when you last visited it.
When you return to report using recently accessed section, you’ll see the changes you made to the report. This allows you to return to your previous analytics quickly.
Suggested for you
As you start using Google Analytics you’ll start to come across sections that you did not have seen recently. For example, if you view a card as a regular feature in the User Acquisition report, Analytics displays the new user first via the User Medium card.
Insights & Recommendations
Insights tell you about unusual changes, emerging trends, and other surprises on your website and app.For example, viewing specific anomalies can help you more quickly identify data changes that may require further analysis and action.
Recommendation provides tailored suggestions to help you get the most useful and accurate data and take advantage of new when available and to make the most of relevant features. Google makes suggestions based on your property’s history, your settings, and trends in Google Analytics.
Conclusion
Google Analytics 4 is a powerful tool for tracking user behavior on your website. It includes comprehensive data collection, advanced machine learning, event data mining, and other user tracking capabilities with data privacy.
By configuring Google Analytics 4 for your website and app, you unlock a powerful suite of tools to advance your digital strategy.
If you’re not already using Google Analytics 4, start taking advantage of the next generation of Google Analytics today.


